Thursday 25 June 2009

It’s been a long time since the last update but not because the build has halted… I’ve had my viva and got some letters (PhD), Dr Will still sounds strange! The write-up period ended up giving me a dislike of typing and computers in general so I’ve been keeping busy in the garage.

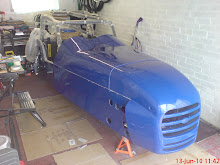
The correct sump baffle arrived quickly and is now installed. I’ve also got a new oil filter, have held off on fitting this as I may be getting a sandwich plate (between engine block and filter) to accommodate the oil pressure and temperature sensors.

Rivnut tool


I’ve made a rivnut tool for the larger size rivnuts, the tool I bought is only capable of <>


The end result used for installing M8 rivnuts:


1x M8 hex key 1x M8 cap head bolt

1x ali strip (2 mm) ~15 cm long (with suitable holes)


1x M8 nut (nyloc)


1x M8 washer


1x spanner


After a couple of practice attempts I was happy with how it worked, giving a nice even crush on the rivnut. I then installed the rivnuts for the pedal box.


Fuel system


Tank


The tank will be secured using the tank straps (made earlier) and rivnuts in the tank support brackets (also lined with foam).


Vent valve

To allow air in and out of the tank (equalise pressure) and prevent fuel escaping in the event of a roll. I’ve fitted a tank breather valve to one of the pipes from the top right of the tank (next the return pipe). This needs to be mounted vertically so I used a short length of the narrower fuel pipe, from the original bike fuel return, straight onto the vent port.


Pipe work

I’ve re-routed the return line so that it clears the mounting plate for the Quaife reverse box. All the 8 mm copper fuel lines have been secured with p-clips every 10 – 12 cm. The ends of each pipe were flared to give a good seal against the flexi lines when clamped with fuel hose clips.


Reusing R1 connector


For attaching the fuel supply fexi hose to the fuel rail I reused the original releasable joint. This just required removing the original supply line (easily trimmed off).


Sender
The sender unit needed positioning so when mounted to the top right of the tank with the float was near central, moving freely and would engage the switch before reaching the bottom of the tank (to give some reserve once warning light is on). This took a bit of thinking to get the correct bend in the float arm.


Filter

I’ve fitted a clear plastic free flowing fuel filter, so I can keep an eye on what’s going on. This is located between the tank and fuel pump.


Pump

To fit the fuel pump I’ve made a bracket from 2 mm ali strip lined with foam strip. I mounted this left of the diff with a rivnut in a chassis rail.
More photos of the fuel system install to follow, plenty of other bits have been done but thats enough computer time for now....

Monday 13 April 2009

March-April 09


I’ve managed to get a few bits done since submitting the thesis and getting my viva out of the way. The rear brake lines have been routed up the transmission tunnel and fixed using p-clips (gaps <>


Over the Easter bank holiday weekend I had planned to fit the baffle plate into the sump. Unfortunately once I’d drained the oil and got into the sump it was quickly obvious the hole pattern on the baffle was not going to fit. The oil pick-up tube and oil strainer had to be removed, the baffle inserted and then the pipes reattached to hold the baffle in place… not possible with this hole pattern.

A quick call to Malcolm at Yorkshire engines confirmed I have the wrong baffle.
The next job I tackled was fabricating a pair of petrol tank straps from two ali strips and some sticky backed foam strip. I bent the ali to fit, stuck the foam to the side contacting the tank and drilled holes at either end for bolting to the tank support brackets (also faced with sticky back foam).


Whilst doing the fuel system I started routing the 8mm copper fuel pipes (with correct markings), this is much trickier than the brake pipes, being much thicker! I’m not entirely happy with the routing as it stands, shall probably have a think and have a second attempt.


A couple of other things I’ve been working on are the pedals, now with bright blue grip tape trimmed to fit (looking sharp I think) and some additional M8 bolts holding the pedal box to the floor. I also got all the bodywork out and put it together to see how it looks, nice!

Sunday 15 February 2009

Thesis submitted: build progress


Well it’s been a slow time in the garage of late due to getting a full time job (Research Scientist) playing with bioreactors (fermentors) and writing up my PhD. However, the Thesis is now submitted with the viva coming up in early March so I am getting my life back!


When I have been able to get out the spanners over the Christmas period I managed to get the driver side bulkhead fitted (Siklaflex and rivets) and the passenger side bulkhead trimmed and ready for fitting.

The pedal box has been trial fitted and I’ve bought some bright blue skateboard deck grip tape to put one the pedals. I’m planning on putting the icons for the controls (Throttle Brake, shift up/down etc.) from GT on the Playstation on each of the pedals.

Since submitting I’ve got the front brake pipes routed and fixed (p-clips and 3.5 mm rivets) with a spacing of 120 mm (maximum 6 inch spacing for SVA). The front brake T-piece was attached to the chassis and the brake pressure switch was installed.

So the pedal box could be fitted, holes had to be drilled through the bulkhead to accommodate the master cylinders (front and rear) and 4x M8 bolts for mounting the pedal box. The dremmel style tool came in very handy for fettling the large MC holes.

I’m hoping to get the remaining brake lines routed and fixed in the next few weeks depending on how my viva preparation goes. Finger crossed!

Sunday 26 October 2008

Collecting the kit


IT’S ON!
I am now the proud owner of numerous piles of bits; sufficient to make a car! It all came about on the 24th October 2008, a wet and windy day and I had hired a “big” LWB van from 1van1. We (my girlfriend Helen and I) set off, slightly later than planned, for the trip up to MNR’s premises up near Harrogate arriving at about 3 pm. After stretching the legs we went to see my chassis and a big pile of parts, had a swift cuppa and a chat with Chris. Before loading the van could begin Chris went through all the parts, identifying any missing bits that would need to follow on. This was very useful and there were only a couple of bits still waiting for delivered from the suppliers.

With some additional help we then set to and loaded the van, using copious amounts of bubble wrap and cardboard to protect my baby during transit. The weight of the chassis was more than I had expected as the engine had already been mounted (in its contrasting Rossi blue cradle). I settled up with Chris and we hit the road, huge grin on my face.

The homeward trip was just as wet and windy as when coming up and the thought of having my little car in the back of the van made for some “interesting” moments on the A1… well paranoia! I had arranged to hook up with my brother at Blyth services (about half way between Newcastle and Saffron Walden) as he was coming down to help with the unloading. Whilst having a chat I said “my cars in the back of the van” it seemed like a reasonable thing to say to me, he found it amusing. I then proceeded to show him that I did in fact have a car in the van. We set off and got to my place at 8ish and began unpacking all the boxes, pipes and parts. As mentioned earlier the chassis was heavier than expected, fortunately my neighbour was in and got press ganged into helping move it into its new home.

The rest of the evening was like some sort of uber Christmas; breaking into boxes to see what was where. Had a go sitting in the GRP shell seats with the steering wheel making warp warp noises (it is a BEC after all). Also sat in the chassis for the first time, again had to make some “driving” noises.

What next…. Well the build can start! I had been waiting to get the kit before buying lots of tools and sundry items. Now I’ve had a nose through all the boxes and got parts to hand, I can see what needs getting. I keep getting hit by waves of sheer excitement followed by “what on earth do I think I’m doing?” The plan is to break the build into many, many small tasks.

Small tasks are also a good idea, as I’m currently writing-up my PhD Thesis, the bit I’d dreaded from the start 3 years ago. So I’ll be doing something useful (writing) and then something “fun” (building the car).

The first job is to fit the foot well bulkheads and break lines then master cylinders. I’ll have to order a selection of rivnuts for this.

Saturday 11 October 2008

A little bit of background and my kit of choice

I first had ideas about building my own car a good few years ago, it possibly started with seeing Patrick McGoohan driving a Lotus 7 in the opening sequence of the Prisoner… who can say! Anyways, I had decided that building a Lotus seven inspired sports car would be the thing to do. It’s been a rolling three year plan, coming close a couple of times, but at last I’ve taken the plunge and I’m expecting my baby soon! I had looked at options ranging from the mx-5 based SDV Westfield to thoughts of a scratch build Locost as per Build a sportscar for as little as £250. My spanner monkeying skills aren’t quite up to the scratch build but I wanted more of a challenge than a bolt together out of the box car.I had heard good things about MNR’s VortX, after seeing them in the flesh at a couple of kit car shows and being fortunate enough to get a ride out in a lovely R1 powered example. A road trip up to Harrogate to visit Chris and Mark’s premises was instigated; a deposit was duly put down and the specs list drawn up. It was a great day out and after 10 years of planning, very exciting!

The kit I’ve ordered is a VortX RT (Road and Track) IB (Inboard suspension) in its BEC (Bike Engined Car) guise. The 2003 Yamaha R1 engine was the engine of choice, expected to put out approx. 150 bhp. With the loose target wet weight of the car being around 400 Kg, it should be rapid enough to get started with. Whilst up at MNR, I was measured up for the lightweight full race cage.

The colour scheme I’d originally dreamt up was based the british racing green and yellow nose band leading into a central stripe. Once up at MNR with the colour charts being thumbed through alternatives soon in my head, easyjet orange perhaps? But in the workshop was a complete kit hiding in a packing create… a really nice blue. This turned out to be “Rossi Blue” the team colours of Yamaha. This was decided on for the body tub with black arches. As a nice little touch the engine cradle is also going to be in blue contrasting with the rest of the chassis.

The kit should be ready for collection in a few short weeks, finding a LWB hire van to bring it all home is next up

Wednesday 3 September 2008

Preping the garage ahead of the build


To make the garage a brighter and less dusty work space I have sealed and painted the walls and roof with emulsion. The floor still needs painting with special red floor paint but need to wait for the sealant to dry fully. As there is no power or lighting, I have wired up a 5ft fluorescent batten light with an extension lead running from the house. The many many spiders that were happy in the dark have now been "re-homed" most relocated themselves into the house, pesky little blighters. Next job is to get the floor finished and sort out some storage ahead of the kit arriving.


After what seems like yonks, with a big job interview and “work” work getting in the way, I managed to get a solid weekend in the garage…. The result is a nice dust free “Tile red” floor. This needs to fully harden for 5 days to prevent lifting at pressure points/ oily patches. Then a carefully selected pile of useful things can go in. I’ve bough two sets of 2 ton axle stands so the chassis will sit at slightly more comfortable working height. I may also look into getting some carpet off-cuts as the floor painting process highlighted that “concrete is indeed hard on the knees”.